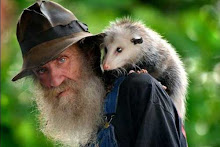
How to create old-style black and White photos - Jon McGovern shows us how we can age our photos in Photoshop.
Something that has sadly been lost in the digital age is the grainy, gritty imperfection evident in old black-and-white images. This might sound like a good thing, and crystal clear images are fantastic. But I think that there is still a place in everyone’s portfolio for some old-style B&W photos, which is why I wrote this tutorial.
So enough talking – how is it done?
So enough talking – how is it done?
- Choose a photo and desaturate it. (Shift+Ctrl+U)
- Open the Levels dialogue (Ctrl+L) and play around with the sliders until you get a substantially darker image without too much loss in detail. See which values I used as a guideline.
- Now we need the grain. Select Filter>Noise>Add Noise. Make sure Distribution is set as Uniform and Monochromatic is selected. For the amount, I used 5% on a 1024 by 685 image, but use whatever looks best for your image. Look at mine to see how much noise you should be looking at, but feel free to go for a more subtle – or even more grainy – look.
- Now you can increase the contrast a little, to taste (I increased it by 100% in Photoshop CS3, but the values are different in earlier versions.
- Apply a bit of dodging and burning if you wish.
- You’re now finished!
Some people also apply a bit of sharpening (Filter>Sharpen>Unsharp Mask) to their photos as well, though I find this a little too harsh. If you do try this, I don’t recommend using a radius above 2 (unless you want a really strange effect).
Also experiment with Colour Balance (Ctrl+B) to add a spot of colour to your old-style B&W shots. A simpler way to do this is by using Image>Adjustments>Variations, though this is less versatile.
Photoshop tutorial - creating old-style photos
Blogged with the Flock Browser

Nessun commento:
Posta un commento